
Whether you’re moving into a fixer-upper or simply want to refresh a tired space, one of the most daunting design challenges homeowners face is removing old wallpaper. It might feel like a job only for pros, but the truth is—with the right tools and a little patience—you can tackle this project yourself and reveal fresh, paintable walls beneath.
This comprehensive guide walks you through four proven methods for wallpaper removal, including step-by-step instructions, tools you’ll need, and real-life tips to save time (and sanity). From traditional paper to vinyl overlays, we’ve got your walls covered—until you uncover them.
Why Removing Wallpaper the Right Way Matters
You might be tempted to paint over wallpaper or pull it down in big strips without prep, but that can lead to major headaches later. Here’s why a smart removal strategy matters:
- Avoid Wall Damage: Ripping without technique can tear drywall or leave glue residue.
- Ensure Smooth Results: Prepping properly means a cleaner, more paint-ready surface.
- Preserve Your Investment: If you’re renovating, removing wallpaper correctly helps protect home value.
Step 1: Identify Your Wallpaper Type
Before jumping into removal, determine what kind of wallpaper you’re dealing with. This will help you choose the most effective method.
Check for:
- Peelable Wallpaper: Top decorative layer peels off easily, leaving a paper backing.
- Strippable Wallpaper: Comes off in whole sheets with just water.
- Vinyl-Coated Wallpaper: Has a plastic-like surface that resists water (you’ll need to score it).
- Traditional Paper Wallpaper: Usually requires a soaking agent to break down paste.
Try peeling a small corner in an out-of-sight spot. If it comes off in one sheet—lucky you! If not, one of the methods below will help.
Tools & Materials You’ll Need
Regardless of the method, gather these essentials:
- Drop cloths or plastic sheeting
- Painter’s tape
- Wallpaper scraper or putty knife
- Sponge and bucket
- Scoring tool
- Spray bottle or pump sprayer
- Dish soap or wallpaper removal solution
- Steamer (for Method 3)
- Ladder
- Protective gloves
- Goggles (if using chemicals)
The 4 Best Methods for Removing Wallpaper
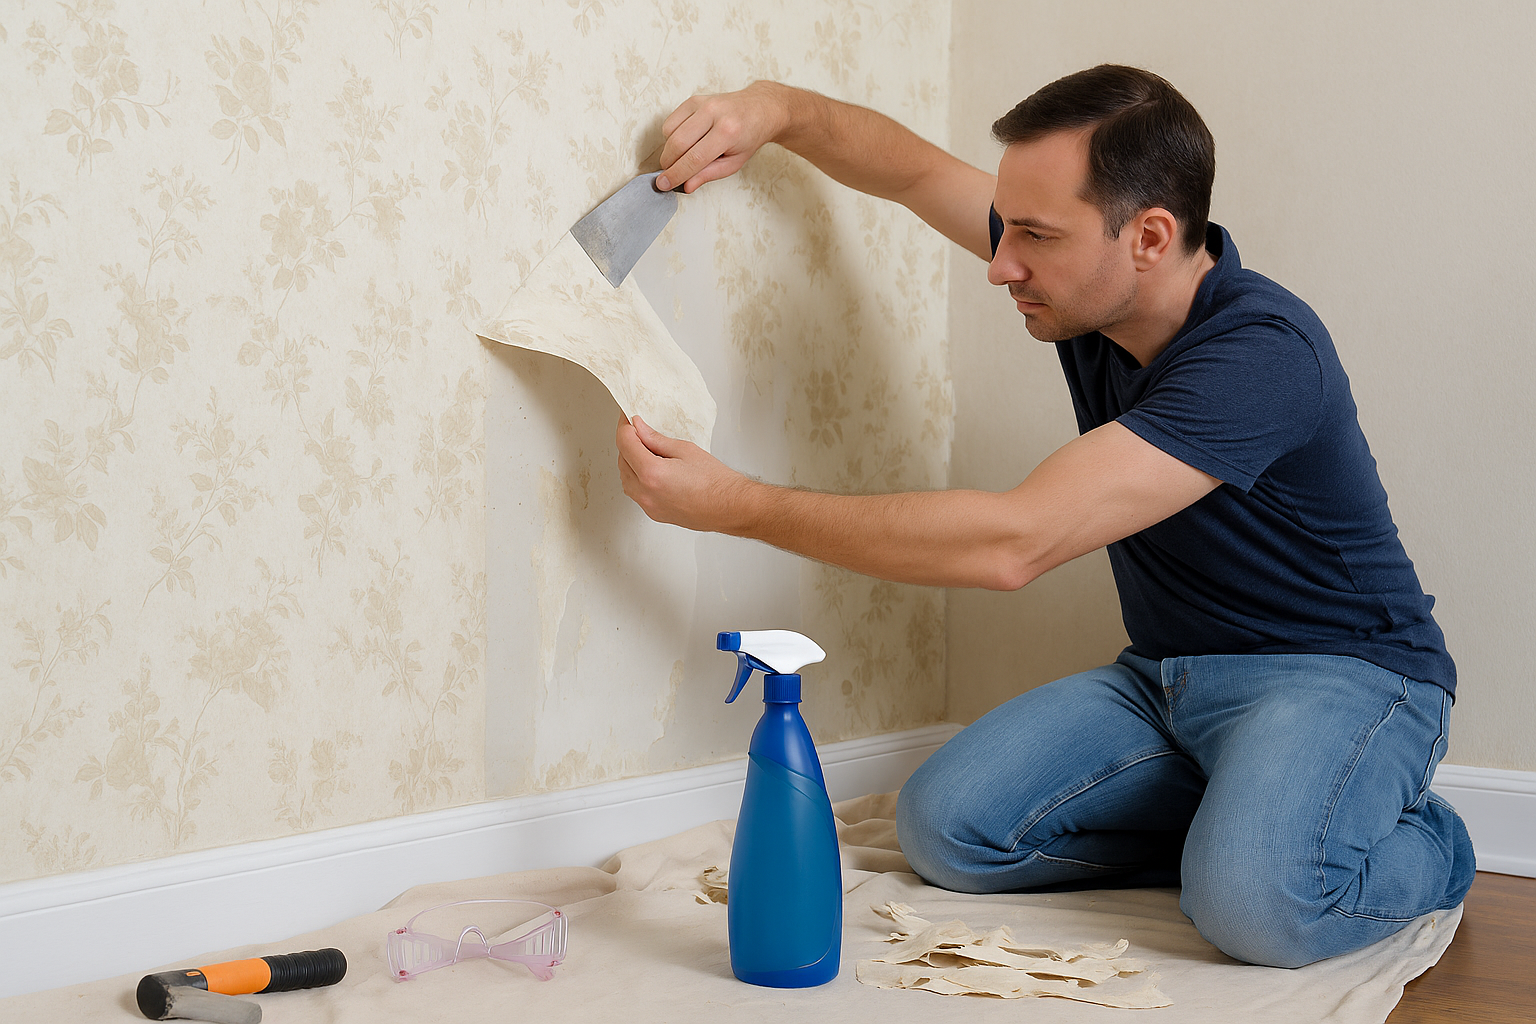
Method 1: The Soapy Water Method (Best for Strippable Wallpaper)
This is the most eco-friendly, budget-friendly method and a good starting point for strippable or lightly glued wallpaper.
Steps:
- Prep the Area:
- Cover floors with drop cloths.
- Remove switch plates and outlet covers.
- Score the Wallpaper (if needed):
- If your wallpaper is vinyl-coated or not absorbing water, use a wallpaper scoring tool to create small holes in the surface.
- Mix Solution:
- Combine warm water with a few drops of dish soap in a spray bottle or bucket.
- Soak the Wallpaper:
- Spray liberally and let sit for 15–20 minutes.
- Scrape It Off:
- Use a scraper to gently lift the paper. Start from the bottom and work up.
- Wipe the Wall:
- Use a sponge with warm water to remove glue residue.
Pros:
- Non-toxic and safe
- Inexpensive
Cons:
- Can be time-consuming if paper is stubborn
- Not ideal for vinyl wallpaper
Method 2: Chemical Wallpaper Removers (Best for Stubborn or Old Wallpaper)
If soap and water don’t cut it, a store-bought wallpaper removal solution can help.
Steps:
- Prep and Score:
- Same prep as Method 1.
- Score wallpaper to help solution penetrate.
- Apply Chemical Solution:
- Follow bottle instructions—usually spray and wait 15–20 minutes.
- Wear gloves and ventilate the room.
- Scrape Off Wallpaper:
- Use a wide putty knife to remove soaked wallpaper.
- Clean Residue:
- Use warm water and sponge to wipe down walls thoroughly.
Pros:
- More effective for layered or decades-old wallpaper
Cons:
- Chemical smell and potential irritation
- Requires more safety precautions
Method 3: Steamer Method (Best for Large Areas or Multiple Layers)
Rent or buy a wallpaper steamer if you’re working on a large space or facing multiple stubborn layers.
Steps:
- Fill and Heat the Steamer:
- Add water per manufacturer instructions and wait for it to heat up.
- Apply Steam:
- Hold the steam pad to the wall for 10–20 seconds.
- Scrape Gently:
- After steaming, use a scraper to remove the paper.
- Repeat as Needed:
- Work in small sections. Re-steam if needed.
Pros:
- Highly effective for difficult wallpaper
- No harsh chemicals
Cons:
- Equipment can be bulky and hot
- Slower for small projects
- Slight learning curve
Method 4: Peel-and-Remove (Best for Peelable Wallpaper)
Lucky enough to have peelable wallpaper? Here’s your simplest method.
Steps:
- Lift a Corner:
- Use a utility knife to peel a small section.
- Pull Gently:
- Peel slowly to avoid tearing or damaging drywall.
- Remove the Paper Backing:
- If backing is left behind, use Method 1 (soapy water) to remove it.
Pros:
- Fast and easy
- No special tools required
Cons:
- Only works on peelable wallpaper
- Backing usually remains
Dealing With Wallpaper Glue Residue
Once the wallpaper is gone, you may be left with glue residue.
How to Remove Glue:
- Mix a vinegar solution (1 part vinegar to 3 parts hot water)
- Or use a store-bought adhesive remover
- Wipe with sponge and repeat as needed
- Let walls dry completely before sanding or painting
Preparing Walls After Wallpaper Removal
Don’t skip this final step! Prepping your walls ensures a smooth finish whether you’re painting, re-papering, or tiling.
Steps:
- Sand lightly with 120–150 grit sandpaper to remove bumps.
- Patch Holes with spackling paste and let dry.
- Prime with a high-quality drywall primer before painting.
- Inspect with a flashlight at an angle to spot imperfections.
Pro Tips for Success
- Work in sections: Don’t try to soak an entire room at once.
- Use plastic putty knives: They’re gentler on drywall than metal.
- Keep a trash bag nearby: Discard wet paper as you go.
- Test a small section first: Always test your method before doing a whole wall.
- Be patient: Wallpaper removal is a process. Take breaks if needed.
Common Mistakes to Avoid
| Mistake | Why It’s a Problem |
|---|---|
| Skipping the scoring step | Prevents solution from penetrating |
| Not removing glue | Can ruin paint adhesion later |
| Using metal scraper too aggressively | May gouge drywall |
| Rushing the soak time | Leads to more scraping effort |
| Forgetting ventilation | Chemical removers need airflow |
When to Hire a Pro
If your wallpaper:
- Covers plaster walls that could crumble
- Is very old, layered, or painted over
- Covers a multi-story staircase or high walls
…it may be worth getting a professional estimate. Labor costs vary, but for intricate or historic homes, a pro ensures minimal damage and faster results.
FAQs About Wallpaper Removal
Can I paint over wallpaper instead?
You can, but it’s risky. Paint may not adhere well, seams can show through, and if the wallpaper eventually peels, so will the paint.
How long does it take to remove wallpaper?
Depends on room size and method. A small room might take 4–6 hours; a larger one can take a full weekend.
Can I use a hair dryer instead of a steamer?
Not really. Hair dryers don’t generate enough steam to loosen glue effectively.
Conclusion
Removing wallpaper may seem intimidating, but armed with the right tools, method, and a little elbow grease, you can transform your walls from dated to dreamy. Whether you go the natural route with soapy water or power up a steamer, these four trusted techniques will help you achieve smooth, ready-to-paint surfaces—no professional required.
So roll up your sleeves, put on some music, and start peeling back the past—one strip at a time.